Looking for writing-related posts? Check out my new writing blog, www.larrykollar.com!
Showing posts with label technology. Show all posts

Thursday, February 09, 2017 No comments

Tech Tuesday (on Thursday): Tines 1.11

I didn't get this posted Tuesday. Oh well.

The two biggest components in this release are compatibility enhancements:

  • Tines now compiles and runs on Cygwin, something I've wanted for a while. That involved changing escdelay from a variable to a CLI command. The change is backward-compatible; there’s no difference in how it works in .tinesrc and scripts.
  • Tines now preserves and (where it makes sense) uses the metadata in the OPML <head>. You can access and change metadata through text variables, and Tines uses reasonable defaults when necessary.

With 1.11.0, Tines is essentially complete. The Creeping Feature Creature will get hungry some day, no doubt, but for now I’m going to focus on making packages available for people who don’t want to compile the app themselves, making the code more robust, and squashing any bugs that turn up. I might tinker with alternative RC files to focus Tines on special purpose uses as well.

Tuesday, August 30, 2016 No comments

Tech Tuesday: Distraction-Free for Free

I’m a very technical boy. So I decided to get as crude
as possible. These days, though, you have to be pretty
technical before you can even aspire to crudeness.
— William Gibson, Johnny Mnemonic

The writing advice people (and websites) are always harping about minimizing distractions. Shut off Twitter (or your social media of choice), close the browser, fill your screen with the editor, and just write look a squirrel! You can even buy special editors that fill the screen automatically… well, of course you can. Seems like everybody and their dogs are trying to make money off writers these days, aspiring and otherwise.

The thing is, it’s really easy to set up a distraction-free writing environment using the tools and apps that come standard with your operating system—at least for MacOSX and Linux. It’s probably true for the Microsoft thing as well, but I’ll have to look at it a little closer. Both MacOSX and Linux evolved from Unix, an operating system that dates back to when computers were more expensive than displays—so you would have a bunch of people using one computer, typing commands and text into terminals. That was back when timesharing didn’t refer to a sketchy way to sell the same condo to 50 people.

The interesting part is, all the code needed to support that circa-1980 hardware is still part of modern operating systems, and we can use that code to create our distraction-free environment. So let’s get to a shell prompt, the way we all interacted with computers before 1984.

Down and Dirty

If I 
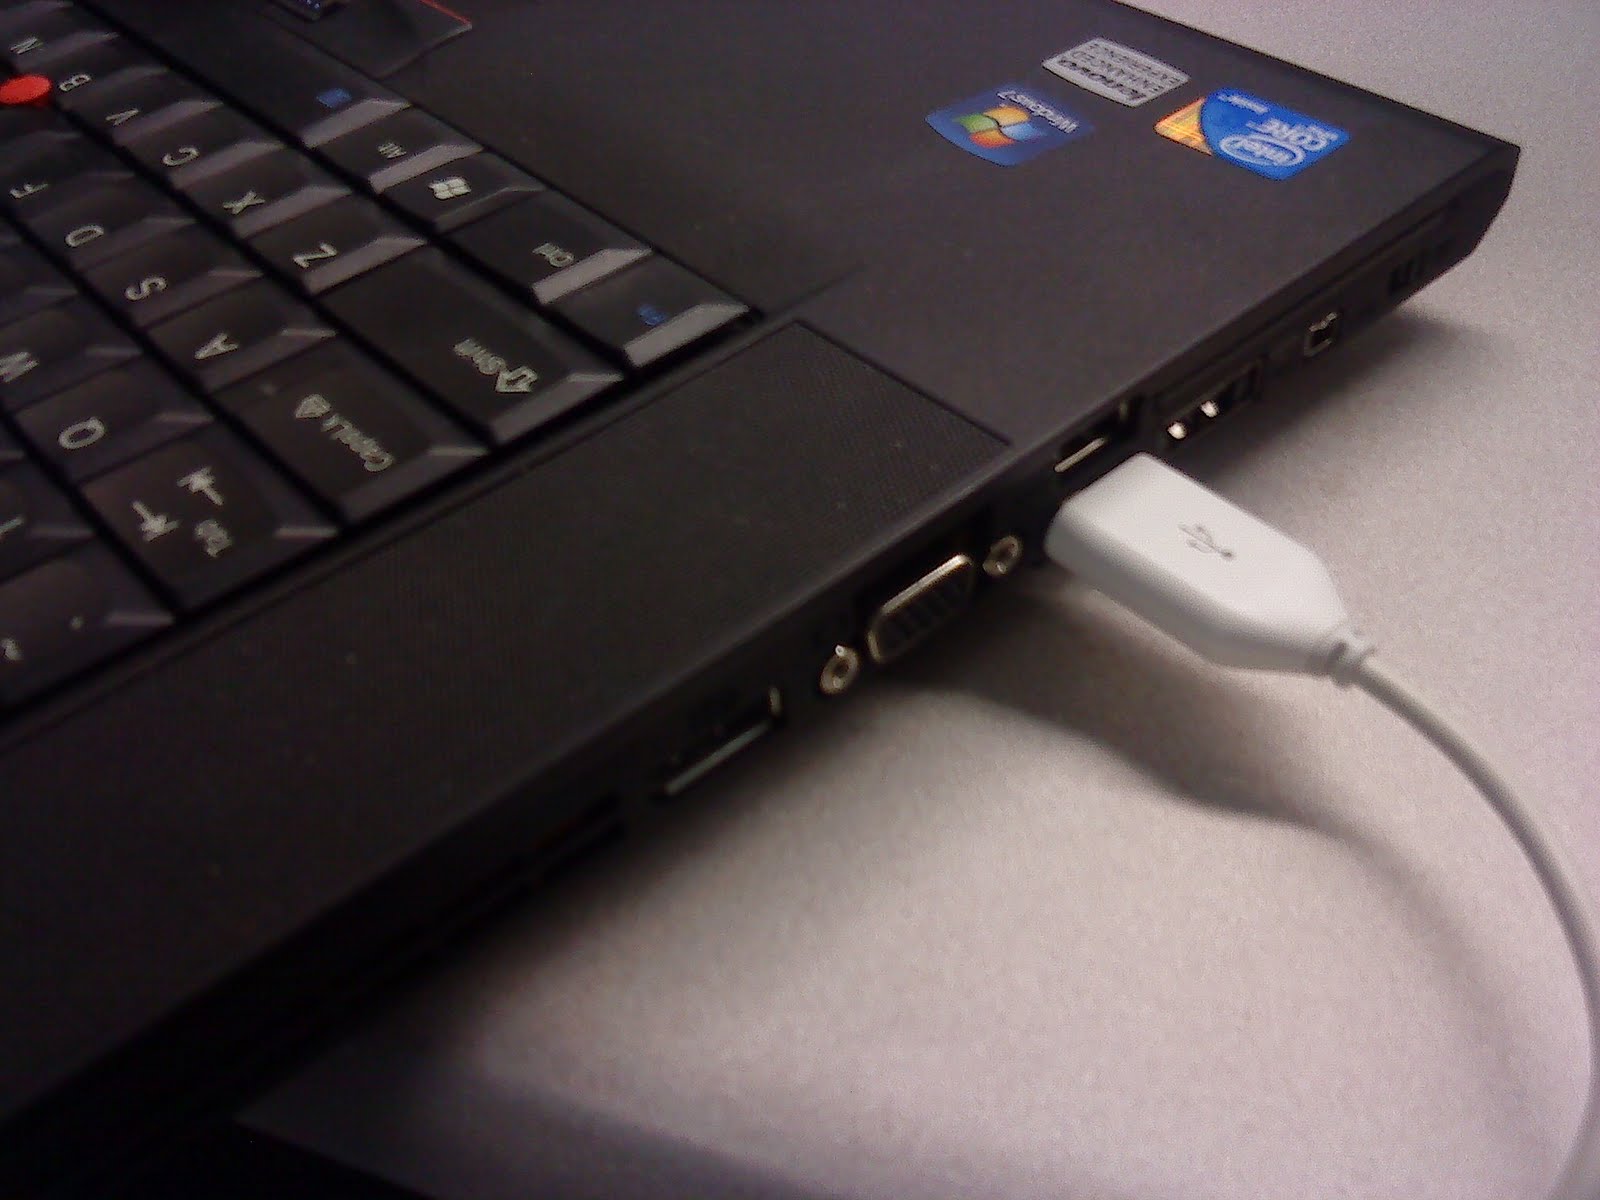
really wanted to get down and dirty, I’d get a USB-to-serial adapter and hook up that old VT220 terminal I still have laying around. But we’re focusing on stuff you already have on your computer.

Personally, I like to have some music playing while I’m writing at home—it masks TV noise, kid noise, dog noise (unless there’s a thunderstorm, then she’s moaning under my feet), and noise from outside. But you might have a stereo in your writing room, or you find the music distracting, and you don’t need anything but a screen to type into.

Keeping the Johnny Mnemonic quote above in mind, Linux is more technical than MacOSX, so it’s easier to get to the crudeness you want using Linux. Press Ctrl+Opt+F1, and you’ll be presented with a glorious console with a login prompt. Most versions of Linux have six of these consoles; press Ctrl+Opt+F7 to get back to the graphical interface. I have never dug into the reason why Linux typically has six text consoles… I’m sure there’s a reason. Anyway, enter your usual login name and password at the prompts.

If you’ve set up MacOSX to automatically log you in when you start up… don’t. For one thing, you’re inviting anyone who gets into your house to poke through your stuff. For another, you can’t get to the one console that Apple provides. To fix this, open System Preferences, select “Users and Groups,” then click “Login Options” at the bottom of your list of user names.


Once you’re there, make sure “Automatic login” is set to Off. Next up, set “Display login window as” to “Name and password.”

While you’re in this screen, make sure your regular user name is not an administrative account. Set up a separate admin account if you need to, and remember that admin password. These are things that make it harder for malware (or your teenage niece) to do things they shouldn’t be doing on your computer.

But I digress. Next time you log in, instead of typing your usual user name, type >console and press Return. This immediately drops you into a text console and presents you with a login and password prompt.

So… Linux or Mac, you have a text console until you press Ctrl+D at a shell prompt to exit. Skip down to “Now What?” to see what’s next.

Work Within the System

If you’re not quite ready to abandon all hope the graphical interface entirely, because you might need to jump onto the Web to goof off research something important, you can still eliminate most distractions… although all those distractions are still easily available if you can’t resist. Perhaps it’s a small price to pay to have your music, right?

Most Linux systems make it really easy to get a terminal app on the screen, whether through shortcuts or the application menu (look in Accessories or Utilities). Macs aren’t much more difficult—press Cmd-space to pop up Spotlight; typing term should be enough for it to complete Terminal (it’s in /Applications/Utilities if you want to do it from the Finder). Press Return, and it should start. If you’re using the Microsoft thing, look for “Command Prompt” or “PowerShell” in your Start menu. One or the other should be in Accessories.

Now that you have a terminal window up, you need to maximize it to keep the distractions at bay look a squirrel!. On Macs, press Ctrl-Cmd-F to enter full-screen mode (press it again to exit). On Linux, your distribution determines the keystroke; Ubuntu uses F11. You can always click the “maximize” button to expand the window, although this leaves extraneous window elements visible. You can also maximize a command window in the Microsoft thing.

One of the advantages of a terminal app over a console: you can increase the text size, either by using the terminal app’s preferences or by using a keystroke (Cmd+ on Macs). 18 points should be sufficient on a laptop; you might want 24 points or even huger on a big desktop screen.

Okay, you’re ready to go…

Now What?

Okay, now you have a screen full of nothing but white text on a black background. There’s a prompt at the top, usually ending with a $ symbol.

The distraction-free writing paradigm basically turns your computer into an electronic version of a manual typewriter. No going back, no editing on the fly, just type your story and hope the result isn’t too incoherent to salvage (says the guy who likes to edit as he composes).

There are few lower-level ways to input text than using a line editor, and Unix derivatives (including both Linux and MacOSX) include ed.  Johnny Mnemonic, that technical boy, would have been proud of ed. It’s about as crude as it gets. So let’s get crude! Type ed and press Return.

Nothing happened. Or did it?

Ed (as we’ll refer to ed for a while) is a program of very few words, which is exactly what you want when you’re going for a minimalist writing environment. If you give Ed a command he doesn’t understand, or one that might destroy your work, he will respond with ? (a minimalist understands when that means “huh?” or “you don’t really want to do that, right?”). Ed’s commands all consist of a single character; in some cases, you might include a range of lines or some other info. But right now, there are three commands you really care about.

Right now, you should see a blank line. Type i and press Return. This enters input mode, where everything you type is copied into Ed’s buffer. Ed will happily ingest everything you type, until you enter a line containing only a . character. That tells him to return to command mode. The following screen shot shows an example.


Now for the second command: saving what you entered. Type w and the name you want to give the story. Make sure you’re not using that name already, or you’ll overwrite what’s there! I reserve a few file names like foo, junk, and tmp for situations like this, when I either don’t need to keep what’s in the file or plan to do something else with it right away (like copy it into Scrivener). Anyway, after you use the w command, Ed responds with the number of characters it wrote into the file. If you want a rough word count, divide by 5 (I wrote 1458 characters, a shade under 300 words, in the above example).

All done! Type q and press Return, and you’ll return to the shell prompt. If you want to keep writing instead, type $a and press Return. This command means “go to the last line” ($) “and append.” Again, Ed will take everything you type as input until you enter a line containing only a . character. This time, you can just type w and press Return, because Ed remembers the last file name you used. Just remember to use q when you’re done.

Bonus Info

Now you’re at the shell prompt, and you want to know exactly how many words you typed? Type wc and the file name, and press Return. The info you get looks like this (using the above example):

Kahuna:fiction larry$ wc tollen.md 
      31     269    1458 tollen.md
Kahuna:fiction larry$

You get three numbers: lines, words, and characters. So that number in the middle, 269, is the actual number of words I wrote.

If you’re not enamored with Ed’s ultra-minimalism, try entering nano or pico instead. Both of these are simple screen-oriented text editors that include a little help at the bottom of the screen (but will let you arrow back and noodle with the text).

Like with any writing tool, you’ll improve with practice. Don’t give up right away; try a different editor or even a different color scheme (most terminal apps let you choose colors). And don’t forget to copy your text into your normal writing tool!

Your Turn!

Have you ever tried a minimalist writing environment? How did it work? Get as detailed (or as minimalist) as you like in the comments.

Tuesday, August 16, 2016 3 comments

CreateSpace Cover Calculator (Tech Tuesday)

To be honest, I’m surprised that CreateSpace doesn’t have something like this on their own site already. Any time you want to publish a paperback with CreateSpace, you need to include a cover (or pay them to make one for you). The DIY guidelines include a formula for calculating spine width, based on the number of pages and what kind of paper you’re using. But even if you’re decent at math, and I am, it can be nerve-wracking enough to double-check and check those measurements again.

Now if there was a way you could feed your page size, number of pages, and paper type to a calculator and get a no-sweat measurement that you could use for that cover…


Oh. Just look to the right. Over there in the sidebar. I’m no JavaScript whiz, but I had a clear idea of what I wanted to do and there’s plenty of information online. I had the thing going in not much time, which surprises me all the more that CreateSpace hasn’t done it. It’s been around for a month or so now, but I figured it was a good topic for Tech Tuesday.

The “Page size” dropdown lets you choose from all the standard CreateSpace sizes, plus a “Spine Only” selection if you’re using a custom page size. The widget automatically adds the 1/8" bleed to all four sides of your cover, expands to show the results, and collapses again if you click Reset. The rest of it should be self-explanatory.

Feel free to drop by and use the widget any time you need to calculate a cover. If you want your own copy, that’s fine, too. I released it under a Creative Commons attribution/share-alike license, which means give me credit and pass your changes on so all indies can benefit. Then again, I’m not sure what else it might need… except maybe a way to select Lightning Source.

Tuesday, August 02, 2016 No comments

Tech Tuesday: Getting Your Outline into Scrivener (pt 2)

In last week’s post, we saw how you can import an OPML outline directly into Scrivener. For those of us who use an outliner for more than the barest-bones plotting, it’s rather limiting. Fortunately, Scrivener has another way to import. It requires an extra step, but Tines (the console-mode outliner I use and maintain) can do the work.

So let’s go…

No Extensions Required

OPML entries have a type attribute associated with them. The standard deliberately leaves the content of type undefined, except it’s some kind of text to describe the entry.

Tines supports two type definitions: "todo," to give an entry a checkbox, and "text" to mark entries as content (non-text entries are assumed to be headings). Tines assigns the F3 key to toggle between text and heading types. A lowercase t to the left of the bullet gives a visual indication. So now, let’s add some more info to the first scene:

Nothing like a little slapstick to start a story, huh?
Note the t at the beginning of each entry under Scene 1. Those are text entries. Other entries will become documents in Scrivener.

Now here’s where the magic happens. In Tines 1.10, there’s an Export->XSLT function that allows exporting through xsltproc. Since OPML and Tines’s native hnb format are XML files, it’s easy to convert them to just about anything. Press ESC to bring up the menu, and go to the File menu…

Changes to the look and feel are due to experiments with the configuration.

Scroll down to Export->XSLT, press Return, then press M at the next prompt to choose Markdown. When prompted, enter a name for the Markdown file (I used storymap.md). If you want, have a look at the Markdown file to see how it does things—a # character at the beginning of a line is a heading, and the number of # characters says what level heading it is. Other lines are body text. Easy, huh?

Now let’s load it into Scrivener. There’s two ways to do that.

Import and Split

I don’t really recommend using File→Import→Import and Split. It works as advertised, importing your Markdown file and splitting it up, but it doesn’t build a hierarchy. It might be useful for importing an outlined chapter into an existing project.


Import as MultiMarkdown

MultiMarkdown is, as one might guess, an extended version of Markdown. Since it’s an extension, you can import plain Markdown as MultiMarkdown without a problem. So try File→Import→MultiMarkdown File instead. Here’s how it looks:


Now this looks pretty close to what we want! Everything is in a nice hierarchy, content is content, and we’re ready to get the story knocked out.

Until next time… keep writing, and keep geeking!

Tuesday, July 26, 2016 1 comment

Tech Tuesday: Getting Your Outline into Scrivener (pt 1)

Part 1 of a two-part series

I’m a pantser by nature. I like to get the story started, then let the characters tell me what happens. But that doesn’t always work. Sometimes, in the heat of composition, you get ideas for side-stories, sequels, and completely different worlds. You can sometimes placate the plot bunnies by giving them a little attention, taking down a few notes and promising to come back when the story at hand is done. Of course, an outliner is one of the best ways to organize notes and plot a story—in the 8-bit pre-DOS days, an early vendor was pleased to call their offering an “idea processor” (and an outfit called Axon uses that label for their mind-mapping tool today).

Scrivener’s Binder pane can be used as a crude outliner. But when you’re trying to bang down some ideas before you forget them (or get distracted by a family member), you want the speed and smooth operation that you get from a dedicated outliner or mind-mapping tool1.

Fortunately, most outliners and mind-mappers support OPML (Outline Processor Markup Language), a very simple XML document type—and so does Scrivener, at least for import. So you can knock out your outline in your favorite outliner or mind-mapper, export as OPML, and pull it right into a new Scrivener project with the hierarchy in place.

Tweaking Scrivener

Before you import, though, you should review Scrivener’s OPML Import settings to make sure they’ll work the way you want. Open Scrivener’s preferences and follow the red numbers:

There’s not much to change. Creating a folder is needed only if you’re importing notes rather than your story line. If you have a “root” entry, with everything else as a lower-level entry, then you already get what amounts to a new folder.

Dealing with notes may or may not be an issue for you. The commercial OmniOutliner added a “note” extension to OPML, for reasons unknown to me, and other outliners (including Tines) now include at least token support for it. Creating a note, and telling Scrivener to import them into the main text of each document, is the only way to pull in content (other than chapter and scene names) using OPML import. Other options are to put notes only in the synopsis, or add them to document notes.

Pulling It In

Maybe an example would help. Thus, a generic story called The Importing, a slightly filled in outline (Trevor McPherson’s StoryMap for Freemind, converted to OPML for this job). I added a note to the first scene in Tines, using an experimental OPML-centric configuration file:


The note content is at the bottom of the screen. Internally, notes use a _note attribute, in parallel with the entry text. Imported into Scrivener, we get something that looks like this:


As you can see, every entry in the outline becomes a document. Notes are extremely limited for writers who want to put in more than one line of content in a scene. I don’t know about anyone else, but I often want to add bits of dialogue, maybe some descriptions of the setting, who’s making an appearance, how the scene wraps up… you get the idea.

Fortunately, there’s another way to get your outline into Scrivener, one that lets you include all the content you feel like adding in the outliner. We’ll take a look in Part 2.


1Think of a mind-mapping tool as a graphical version of an outliner. Each entry is a bubble, centered around a root entry, and can be arranged to suit your needs. Freemind is an open-source example, and runs on all platforms (needs Java though).

Tuesday, June 21, 2016 2 comments

Troubleshooting 101 (Tech Tuesday)

Back at the manor for a couple of days, but I’ll be heading out this morning.

While I was at Mom’s the last couple of weeks, we kept in touch using both the phone and FaceTime. One day, the wife said, “The dryer’s stopped working. It runs, but it doesn’t get the clothes dry. I think the heating element is fried.”

I might be a slow learner, but I can learn. As I said once, there’s no wasted time like time wasted unnecessarily in a chicken house. After replacing a furnace that was actually a thermostat problem, and checking a motor when it was really a switch, I have learned to be extremely wary of her “go directly to the most expensive and/or complicated fix” methodology.


“Have you checked the dryer vent and the ducts?” I asked.

“No, but that’s not the problem, the clothes aren’t getting hot.”

Whatever, I thought, but agreed to have a look when I got home. I didn’t actually get to it until yesterday, but that’s pretty typical. I pulled the dryer back, got the vacuum, and got up an inch of dust behind and under the dryer, then checked the exhaust. It was clear, as was the duct, and I started thinking the wife might have gotten one right.

But as often happens around here, I got yanked off that project to take care of something she wanted done―namely, replacing the furnace filters up in the attic. We have washable filters, so I pulled them out and she agreed to hose them off while I got a nut driver and took the back of the dryer off. But before I found the nut driver, I got interrupted again: “I need a pair of needle-nose pliers,” she called. Figuring she found something in the filter that she couldn’t get hold of, I started looking for them. But before I found them, she called again: “put a Phillips bit on the drill and bring it!”

I couldn’t find the drill, because Daughter Dearest has it down at her place. I grabbed a regular old hand-powered screwdriver and went to her. Turned out she looked up at the dryer vent while hosing off the filter, and took a peek inside. There was about six inches (15cm) of fiber & lint clogging up the vent. We pulled that out, I threw a load in the dryer, and it’s working again.

Troubleshooting 101: check the easy stuff first. Even if it doesn’t fix the problem right away, it doesn’t take long to check. You might not need a new computer, just clean up the old one. Word might not be the problem―strike that, it usually is, the easy fix is using something else. The noise on the phone line might be fixable by tightening the screws at the network interface box. Save yourself a lot of grief and expense, and check the easy stuff first. You can bet a professional repair person will.

Tuesday, June 07, 2016 3 comments

Tines 1.10 (Tech Tuesday)

Friday night, after a few rounds of testing, I decided Tines 1.10 was ready to go and uploaded the source code.

Tines is primarily an outliner, but has functions that make it useful as a planner, organizer, and notebook as well. The code is based on hnb (Hierarchical NoteBook), which I used quite a bit 10 years ago. It runs in a console (terminal, shell, what-have-you)—so it’s plain-text all the way. It can be customized every which way by editing a configuration file, so you can pretty much have everything but a graphical interface. :-) I kept trying different outliners, and kept coming back to hnb because I could make it work exactly the way I wanted.

I mostly lost track of hnb 8 or 9 years ago, after getting a new MacBook Pro at work. The Pro came with OmniOutliner, a very popular MacOS outliner, and I started using it. Then when I got pushed onto a Dozebox, I didn’t have a decent outliner and basically gave up. But late last year, I started looking for a decent outliner to use for both work and personal writing projects. Given that there’s a well-known interchange format for outliners, OPML, having the exact same outliner on all three platforms isn’t a necessity. But I remembered hnb and decided to give it another try.

Technology moves on, and hnb compiled okay, but crashed immediately when starting. I hadn't messed with C code much in years, but it came back to me quick enough. Looking at the source code, I realized it was using 32-bit integers for pointers and modern computers use 64-bit pointers. After fixing all those, it had it running again. I posted to the mailing list on SourceForge and offered patches. One correspondent pointed out that mine was the first legitimate post on the mailing list in years, and suggested I just fork the code and take it over. As if I wasn’t crazy-piled with projects already… but I did it. Thus was Tines born. And Charlie moved into FAR Manor not three weeks later.

Enough of that… what’s it like?

The screen shot here should give you a pretty good idea what Tines looks like. It uses color where available, so it’s not completely boring. It doesn’t use the mouse (yet), but it has menus, function keys, and highlighting.

If you don’t specify a file, Tines opens its “default database” (specifically, .tines in your home directory on OSX and Linux). This is handy for brainstorming stuff, keeping notes and other useful tidbits, or using Tines as a planner. It can import OPML files, save all or part of an outline as OPML, and works with several other file formats. But you can open hnb files (the native format), OPML files, and tab-indented plaintext files as well.

You can use the arrow keys to move around, and use keyboard shortcuts (or press ESC to open the menus) to make changes.

The Planner menu helps you set up a planner, according to David Allen’s Getting Things Done methodology. One powerful new feature in v1.10 is the today command (mapped to “Today’s Agenda” in the Planner menu). If you have set up a calendar using the Planner menu, this command jumps to the entry for today’s date and displays all the items under it. This lets you computerize your tickler file, at least for to-do items and other things that don’t require paper.

If you have a large outline, and you probably will if you keep everything in the default database, you can search for buried treasure… I mean, items that you can’t quite remember where they are. The Level menu lets you sort items in a particular level, which might be useful for notes. There’s also a “shuffle” mode, to randomly disorder items in a level. I’m not sure why you would want to use that, except it might help you to discover relationships between items, but it’s there if you need it.

All well and good—how do you use it for writing?

I’ve long been a pantser, but as I continue writing I find I like to loosely plot my projects so I don’t forget things. Plotting isn’t as fun as letting things happen, but it’s a lot less scary when you have people asking you when the next book is on the way. (And for those of you who have been patiently waiting for The Blood of Heroes, the first draft is almost done. Finally.)

But I digress. An outliner is a good way to plot out a novel or a work of non-fiction. Instead of stifling creativity, it lets you think about other creative things by capturing your thoughts about how to organize your work. I have a memory like a steel sieve, and it frankly scares the crap out of me when I depend on remembering details of the Accidental Sorcerers series—about 200,000 words total published, and more coming. The amazing thing is, I haven’t forgotten anything crucial… so far. But Tines is more than an outliner, and that means you can use it for both your outlines and your story bible without switching applications or even files.

Now here’s the fun part: you can export all or part of your database as OPML. Scrivener reads OPML files, and can create chapter folders and scene documents for each entry. It recognizes the _note attribute extension, and can (by your preference) insert those notes into either the Synopsis or the document proper. So you can add the following code to your .tinesrc (default configuration) file to edit notes:

bind ^N "macro edit_note"
macro define edit_note
 att_get _note
 getquery "Replace _note with:"
 att_set _note $query
end

Press Ctrl-N to create or edit a note. That will end up in the next release, v1.10.1, before too long.

Where do you get it, and what’s next?

Next, I plan to create packages for MacOS X and Linux. Then, I want to get it ported to MS-DOS or FreeDOS and create packages there as well.

Right now, you have to download and compile1 Tines. That certainly limits its extent, even more so than it not being readily available on Doze right now, but that too is on the list. Please give it a try, if you’re inclined, and let me know how it works!


1Compile: from the Latin “com” (together), and pile (a random heap, or possibly hemorrhoids). Thus, “compile” means either “throw things together in a random heap” or “a multifaceted pain in the ass.”

Do you use an outliner? How? Sound off in the comments!

Tuesday, May 10, 2016 5 comments

Protect Yourself from Ransomware (Tech Tuesday)

Welcome to Tech Tuesday, my new occasional column covering the nuts and bolts of writing, publishing, and keeping your tools sharp. There’s likely to be what my redoubtable co-op partner Angela Kulig calls “Finnish,” but I’ll try to keep it accessible.


You’re working away one evening, when your computer locks up and shows you something like this:

Bad news. Really bad news.
Image source: fbi.gov

Unfortunately, it’s not the plot of a bad cyberpunk novel. It recently happened to an acquaintance. Last year, I wrote about Three Ways to Crash-Proof Your Writing, and the tips are still useful. But you might need a little more caution when it comes to ransomware.

What’s Happening In There?
In short, a PC infested with ransomware establishes a connection with its operator. The PC might run normally for a while after getting infested, but at some point the ransomware begins encrypting data files with common extensions like .doc, .psd, .jpg, .zip, and so forth. When it’s done, it displays a ransom note like the one shown above. Operators usually demand Bitcoin payments, because they can’t be traced. Some ransomware allows you to decrypt a single file, thus proving they have the key, and usually give you a few days to get the Bitcoin you need to pay up. If you wait too long, the ransom goes up or the operator destroys the key (which means you're permanently hosed). Scary crap.

Unfortunately, Dropbox is not a failsafe. Ransomware encrypts everything on your hard drive, and if you have Dropbox mirrored, it nails your files there as well.

George R. R. Martin famously does his writing on an air-gapped (i.e. no network connection) PC, running WordStar on MS-DOG [sic]. While he uses WordStar for its simplicity, he also has little to fear from most stripes of malware. Such a setup works well in the traditional publishing realm, where they still prefer to start from paper drafts, but it’s not a bad idea for indies. One might balk at the expense of a second computer—but the typical ransom these days is $500, and you can get a netbook for half that. It’s not bad insurance. Remember, if you’re trying to make money at writing, this is a business. Ransomware is one more disaster to plan for.

Let’s assume that, because you have no room or money for an air-gapped computer, or need to have a browser handy for research, that’s out of the question. What else can you do? Read on…

GROW
Right now (May 2016), the most effective way to avoid ransomware is to GROW (Get Rid Of Windows). Move to MacOS, Linux, or OpenBSD if you possibly can. This is likely a temporary advantage, but it may be a couple of years before ransomware goes beyond Windows. And if the techie press breathlessly reports every minor instance of MacOS malware found in the wild, they’ll be so beside themselves over MacOS ransomware that we’ll never hear the end of it. In other words, it won’t sneak up on us. Actually, I expect iOS malware first, because iDevices are so popular.

As a possible workaround, install a virtualization tool such as VirtualBox, VMware, or Parallels and run a separate operating system inside the virtualizer for Internet access. This isn’t foolproof—ransomware can encrypt virtual drives at a stroke, if you make a mistake—but it’s a little safer.

Stay Up to Date
That should go without saying, but it’s so easy to skip those updates in the middle of a project. Sometimes, there’s good reason for that; updates have been known to hose a working PC. If you’re doing your backups, though, you should be able to revert when needed. Don’t forget to check the backups, on occasion, to make sure important data is still good.

Don’t let your virus/malware protection slide, either. Keep them updated.

Avoid Common Attack Vectors
Currently, there are several common, well-known ways malware (including ransomware) can infest your system:
  • Dodgy attachments in spam
  • Compromised ad servers
  • Websites with infectious Javascript or Flash
Thus, installing ad-blockers and Flash blockers in your browser(s) can offer protection from so-called “drive-by” attacks. Turning off Javascript, once a common trick to speed up browsing and stop useless visual effects, is making a comeback as well. Try it with your favorite websites and see if you can live without it. You can certainly live without it trying to download garbage onto your computer.

Spammers will never go away, even if there’s a special place in Hell for them. They are paying more attention to grammar these days, so you can’t always catch them out by stilted language anymore. Some spam is really phishing, attempting to get you to click a link or open an attachment that Does Not End Well For You. If you’re not expecting that payroll statement from someone you’ve never heard of, don’t open it. If your bank sends you a report about fraudulent activity about your account… it’s not really your bank. A real bank fraud department will call you, verify your identity, then go over a few transactions. (I’ve been there.) In short, don’t open attachments you aren’t expecting.

Pull a Dirty Trick
Since ransomware only encrypts files with known extensions, consider renaming crucial backup files. Instead of GreatAmericanNovel.zip, rename it with a random extension like GreatAmericanNovel.e7b. If you have a thousand photos you don’t want to lose, copy them somewhere else now. Anything your computer can’t access directly, as if it’s on your hard drive, is safe. To be honest, I’m not sure how Google Drive works with saving local copies on a computer; I do know you have to start the Drive app to get the latest onto a tablet or phone, though.

In short, the goal is keeping your computer clean. Failing that, you want to recover with as little hassle as possible. Anticipate the disaster, have a plan, and execute.

References
If you want to dig a little deeper, here’s a couple of links that might be useful:

Your Turn
Have you been clobbered by ransomware? Do you have some prevention or recovery tips? The comment section is open.

Thursday, March 05, 2015 2 comments

Re-Kindled

About a month ago, I dropped my Kindle going into work. It was in a case, but those eInk screens are fragile at the top:

Where’s the title bar?

Once screen rot sets in, it doesn’t get better… only worse. The grey crept down to obliterate half the top line of text, and picked up a few vertical lines down the right side, and I knew the old guy was due for… something. I have a Kindle 3, aka Kindle Keyboard, and I use the keyboard to take notes on stories I’m writing (and sometimes reading for other folks). It has 3G networking, which has come in handy on occasion, and it came out before that whole “Special Offers” stuff that you can pay to get rid of. A Kindle Paperwhite in similar trim (3G, no Special Offers) is north of $200. Yeesh.

But hey, I replaced the battery in my iPhone last summer. Maybe I could do this, too. Googling turned up repair instructions at iFixit—but unfortunately, they don’t carry replacement screens. More Googling turned up videos of the teardown procedure, and another set of instructions at Instructables. I finally found a source for a replacement screen at PowerBook Medic, which also had a Youtube video of the teardown procedure. The screen was used, but flaws were supposed to be cosmetic. It came to less than $30 including shipping, so I figured I’d take a chance. (I was happy in the end.)

Even with the cleanup from Winter #3 going on, the new screen arrived on Saturday as scheduled. After a few of the usual delays that are part of any weekend at FAR Manor, I grabbed my tools and got to work. I think the hardest part of the whole thing was getting the back cover off and on the Kindle. After that, it was a couple dozen itty-bitty screws and four cables. I used paper plates to keep everything as organized as anything gets around here:

How about a nice bowl of Shredded Kindle for breakfast?

That white smear toward the top of the screen is one of several cracks. It wasn’t, as I sort of hoped, just a matter of cables coming loose in the drop. That was an ex-screen. The instructions said I would have to remove the speaker assembly and ground clip, but they stayed attached to the mid-board without any hassle on my part. The iFixit instructions also say to leave the audio cable plugged in, but other instructions said it comes off without any trouble and that was true.

The second hard part was getting the screen off the adhesive. There's a strip on either side of the screen. The right side (from the front) turned loose easy enough, but the other side clung tight. Several of the online instructions warned about how thin the glass backing on the eInk screen is (which is why it broke, I suppose), so I was really careful and finally got it to pop loose.

OuchThe rot continued to advance…

The instructions said “it goes together a lot easier than it comes apart,” and that was mostly true. I continued to consult both step-by-step and video instructions, though, to make sure I got everything right. I had to back up at one point, since the power switch was binding. It turned out I hadn’t snapped in the “mid board” just right.

And my patience was rewarded, even before I got the back snapped all the way on:

It lives! (and I was living this chapter last week)

The rule is, you always end up with more parts than you started with. These things just kind of dropped in out of nowhere when I was reassembling.

Grommets? Standoffs?

Whatever they are, I couldn't figure out where they were supposed to go. The Kindle seems to be working fine without them right now. With any luck, it will continue to keep working.

Wednesday, October 15, 2014 3 comments

Writing Wibbles

I always feel like
somebody's watching me
(And I have no privacy)
—Rockwell

I had a couple of things to share this week—an interview with the creator of the #amwriting hashtag was at the top of the list—but something else reared its ugly adobe head, and vaulted to the top of the list.

Nate Hoffeider at The Digital Reader broke the story a little over a week ago. Adobe Digital Editions (ADE) version 4 “[seems] to be sending an awful lot of data to Adobe’s servers.” Most EPUB-based eBook readers on the market use some version of ADE, although I’m not sure whether any are using ADE4 just yet. Older versions are less intrusive.

How intrusive is this? Let me quote Mr. Hoffeider here:
Adobe is gathering data on the ebooks that have been opened, which pages were read, and in what order. All of this data, including the title, publisher, and other metadata for the book is being sent to Adobe’s server in clear text. …

Adobe isn’t just tracking what users are doing in DE4; this app was also scanning my computer, gathering the metadata from all of the ebooks sitting on my hard disk, and uploading that data to Adobe’s servers. …

And just to be clear, this includes not just ebooks I opened in DE4, but also ebooks I store in calibre and every Epub ebook I happen to have sitting on my hard disk.
(emphasis mine)

The Passive Guy, a lawyer who writes on self-publishing issues, has an excellent summary and links, both in the article and from readers in the comments.

Much of the outrage in the tech side of the community focuses on Adobe’s use of plain text. That is a little disturbing, yes—it means anyone who can put a packet sniffer anywhere along the path between you and Adobe can see all this data. But for me, it’s what the people owning the servers are doing that’s more important. Scraping your hard drive for eBooks makes ADE4 spyware, in my opinion.

When pressed for an explanation, Adobe finally said (in the typical corporate lawyer speak of any company caught with their hands in your pockets) that it’s part of their DRM, and they gave themselves permission to do it through their “privacy” policy.

Now I can already hear the Kindle haters shouting “Amazon does it, too!” Well, yes, Amazon does send some information back to the mothership, but there are (as I see it) three important differences:

  1. Amazon is pretty up-front about what their Whispersync feature does, and it gives back by letting you sync your books across devices. Adobe gives you nothing (or maybe they use the info to target advertising at you, who knows?). You can also turn it off at any time.
  2. Whispersync isn’t a DRM mechanism, at least primarily. It works just as well with non-DRM books sold through the Kindle store.
  3. Amazon doesn’t presume to scrape your hard drive, looking for any MOBI or AZW files you might happen to have, just because they feel like it.

To Panic or not to Panic (probably not)


Since I handle all eBook formatting for Green Envy Press, and I work in EPUB format, I’m pretty sensitive to the idea of some corporation scraping my hard drive and looking over works in progress. Fortunately, I don’t use Adobe software in any part of my production toolchain.

But this is the problem: if people with access (legal or otherwise) to Adobe’s servers were to target a publisher’s typesetting department, they could get advance notice of upcoming titles or other intelligence. Or they could target individuals for blackmail purposes. I find it quite likely that Adobe’s legal department will use this info to shake down unfortunates who land in some kind of piracy profile (whether they’re actually pirating eBooks or not)—or sell the info to large publishers, so they can do the shaking down. I also expect Adobe to “share collected information with our third-party partners” (i.e. sell information about your reading habits to anyone who wants to spam you to death).

On the other hand, this affects only a small but growing number of individuals—those who have been suckered into installing ADE4 on their computers. I don’t know whether any eBook readers use ADE4, or will load that Trojan Horse in a near-future update. Obviously, people in the Kindle ecosystem are immune (beyond the Whispersync issues I mentioned earlier). Apple’s iBooks ecosystem is also Adobe-free, or so I’ve read. Earlier versions of ADE are not nearly as intrusive, so you’re safe in that case as well.

Fortunately, and I’ve said this before, eBook DRM is ridiculously easy to disable. Buy your eBooks from any authorized retailer, strip the DRM, and use Calibre or a third-party eReader to read on your computer. Or buy from those of us who make sure the “use DRM” selection is turned off when we publish.

And then, there’s the technical fix: block the IP addresses assigned to Adobe’s servers at your router. Whether you use DSL, cable, or fiber to get your Internet fix, your router has a fairly simple way to set this up. Look for something like “outgoing filters” and add the addresses shown in the image below. Here’s what I’ve added to my DSL router, just in case:


That won’t stop ADE4 from getting all chatty if you take your laptop outside the house, but it’s a start.


If you haven’t tried my eBooks—DRM-free, available for both Kindle and the rest of the world, and priced to move—why not check them out? The Crossover is free, and the rest are cheaper than a large latte. And unlike a latte, you can enjoy them again and again.

Tuesday, April 16, 2013 3 comments

Sideloading EPUBs into iBooks

Sideloading: the process of transferring data between two local devices, in particular between a computer and a mobile device [such as an eReader].
— Wikipedia

While a backlit LCD isn’t the best kind of screen for reading eBooks, Apple does make the experience as pleasant as possible with its iBooks app. On an iPhone, it hyphenates long words, to avoid making the margins too horrible. While Stanza is growing ever more outdated, there’s still a need to load EPUBs into a reader, just to make sure they’re right if nothing else. And sometimes, you might buy an eBook from Smashwords that you still want to read on your iOS device.

Fortunately, the process is straightforward.

1. Find your eBook.
When you download an eBook, whether on MacOS or that Microsoft thing, it usually ends up in your Downloads folder. Leave the folder window open on your desktop.


2. Open iTunes.
If you’re like me, you already have iTunes open in the “mini player” view. You need to open the expanded view. If you’re using the latest version, display the sidebar and look for “Books.” Select it to see the books in your library.


3. Drag and drop.
Arrange your Downloads window, and the iTunes window, so you can see them both. Drag your book file into a blank area of the iBooks window. It may take a few seconds for the new book to show up in your library, be patient.


4. Sync and go.
Plug your device in and let it sync. It will automatically copy your new eBooks over.

You can actually do the first three steps in less time than it takes to read this blog post… although the sync process will take a while longer.

Monday, April 02, 2012 3 comments

Changing It Around

I didn't set out to do this, but various failures over the weekend kicked off several minor technology changes today. It's like my gadgetry forgot to stop pranking me once April Fools' Day ended…

The old iPhone earbuds I've had since the 3G days are officially worn out: the left earbud has very little audio coming through. I don't know why I put up with that as long as I have, especially since I have a working pair of iPod earbuds (no clicker) and some higher-end things. I'd love to use my Bluetooth stereo headset, but it's good for about six hours and I need at least eight to get me through the workday. Right now, I'm using a pair of Future Sonics in-ear 'phones that I won some years back. I miss the clicker to start/stop my music (or answer the phone), but better that than no left channel.

The iOS Twitter client has become increasingly annoying, especially since IT has made Twitter's webapp unuseable. I need the ability to manage my lists from my phone if I can't use the webapp (or the official OSX Twitter client, for that matter). The last straw was yesterday, when the app decided to not update my Mentions anymore. I downloaded the free (ad-supported) version of Echofon this morning and like it better already. I can manage my lists, and the ads only appear in the primary timeline. The only two drawbacks so far: you have to switch out of Lists to tweet (unless replying/RTing) and I don't think new followers appear in the Mentions column like they do on the webapp.

Finally, I've started using Evernote instead of PlainText to write draft blog posts and story scenes while mobile. The Evernote app doesn't have ads and pulling a draft out of Evernote into Scrivener is about the same amount of effort as pulling it out of Dropbox (where PlainText saves stuff).

Technology can be such a PITA. I'm editing White Pickups on paper, and the only thing I have to worry about there is Mason snatching the pen out of the stack and thereby losing my place.

Thursday, March 22, 2012 3 comments

Here Comes the Sun

The guts of the system (plus some load)
Solar panels, I’ve been told, now cost about half of what they did a year ago. And it’s true — for less than $200, you can build a charging station for your mobile gadgets from off the shelf parts. Just add one sunny window, or take it with you on camping trips to run lights and a radio.

I bought most of the pieces for my system at Amazon and a local auto parts store. Here’s a list of similar items (links go through my affiliate account, so I’ll get a few cents if you buy them through the links). Prices shown were current at the time I typed this in. More about these items below.


Stuff you need:
Left to right: solar panel +/-, battery +/-, load +/-
The heart of the system, obviously, is the charge controller. The controller that comes with the solar panel is a dirt-cheap single-chip design, and is good for 3A at 12V — sized perfectly for one 30W panel. I was expecting the controller to simply provide regulated voltage, and was planning to hack a UPS I had laying around. But when I looked at the instructions, I found that it has a built-in charger circuit, and you just have to attach a 12V battery using the furnished alligator clip leads. Sweet!

The solar panel itself is pretty basic. It has an aluminum frame and a power cable coming out the back. You should cover the leads and the panel itself until you have things hooked up — bare wires touching metal on a bright day can make an impressive spark! (How do I know this?) There are optimum positions for solar panels, but hanging it in a south-facing window (preferably not shaded) is sufficient. It will produce power from dawn to dusk.

Speaking of the battery, you want an appropriate size. Too big, and you spend a lot of money for no gain. Too small, and you’ll be out of juice too soon at night. Since the USB charger I have is rated for 1A, and most gadgets only take a couple hours to fully charge, anything between 8Ah and 12Ah should work very well. Unless you’re only using the system outdoors (like on a camping trip), or installing the battery in a ventilated basement, always use a sealed lead-acid (SLA) battery for this system. Car batteries vent hydrogen gas, which could cause havoc inside your house.

If you’re willing to hack your car charger, you can skip the auxiliary power outlet (also called a cigarette lighter socket). On the other hand, it does provide a clean way to disconnect the car charger if you need to break the system down (like if you’re moving it around). Car chargers are also fused, which provides some protection if you overload it or short it out.

Finally, the power delivery. I personally wouldn’t fool with a USB car charger that isn’t capable of delivering 1A or more — large tablets (like an iPad) won’t charge with anything less, and you want to have some juice left over for your other gadgets. A charger that provides one or two USB jacks and two or three cigarette lighter sockets is a good way to go: the lighter sockets provide a convenient way to plug in your cellphone car charger, and you could run a fan during the day while the solar panel is holding up the battery.

The nice thing about this setup is, the only tool you need is a small Phillips screwdriver. Attach the battery (using the clip leads, don’t forget that red is positive!), then the solar panel, then the auxiliary socket. Plug in the car charger, then plug in your gadgets.

Now this, of course, is just the gateway drug. Eventually, I hope to upsize the system to provide enough power to run the laptop and the network (DSL/router) gadgetry, along with a few emergency lights. I think 100W should be sufficient, but prices continue to come down… and the wife would be thrilled if it could run the TV and DVD player…

Monday, January 23, 2012 4 comments

iBooks Author: the REAL Problem

APPLE WANTS TO
EAT YOUR COPYRIGHT!
There has been a lot of sensationalist “reporting,” breathlessly repeated on Twitter, about the licensing terms for Apple’s new iBooks Author app. I’m not going to reward blind panic with links, but I’m sure you can Google your way to something that would be “enlightenment” if there were any useful information to be gleaned from that link-bait. This fish ain’t bitin’.

The big problem is: there’s something that we, both authors and eReader owners, need to worry about and the link-bait articles aren’t telling us about it. And iBooks Author is only half of it.

Let’s take a look at the clause in the iBooks Author licensing agreement that has all the link-baiters going ballistic. Fortunately, it’s like the third paragraph down in the licensing agreement (under “IMPORTANT NOTE,” emphasis mine):
If you charge a fee for any book or other work you generate using this software (a “Work”), you may only sell or distribute such Work through Apple (e.g. through the iBookstore) and such distribution will be subject to a separate agreement with Apple.
XKCD always puts things in perspective.
I’ve bolded the part that should (but won’t) hush up the link-baiters and the fish that continue to bite at it. Let me make it clear:

Apple is only restricting the output of the software. What you do with eBooks generated by any other means is your own freeking business.

So basically, you can take your MSS and feed it to Amazon, Smashwords, or anywhere else you like. But if you’re selling your book (and aren’t we all?), the version you generate using iBooks Author — and only the version you generate using iBooks Author — has to be sold on the iBookstore. Apple may or may not approve it for sale, as they do for iOS apps on the App Store.

A lot of indie writers have talked about the problems we face, often put succinctly as “now that anyone can publish a novel, anyone does.” Most of us want to put our best foot forward, providing an engaging story at a price that won’t break readers’ banks while giving us the opportunity to earn some recompense for the work we put into bringing that story to the readers. Unfortunately, we are often lumped in with those who just throw whatever they have onto the eBook stores. What Apple is doing is attempting to guarantee some measure of quality (what measure that may be, I have deliberately left undefined) for people who want to sell enhanced eBooks in the iBookstore. Instead of welcoming this development, authors are running around with their hair on fire.

The Real Problem

Unfortunately, iBooks Author presents half of a real problem, one that nobody else is talking about. The other half is presented by… Kindle Format 8. Right up until the new year, we had to deal with only two eBook formats: MOBI (Kindle) and ePUB (everyone else). Both formats are well-standardized — you can build an ePUB by hand if you really want to (I’ve done it) and convert it to MOBI using Amazon’s free KindleGen utility. Now we have Apple’s extension to ePUB (i.e. iBooks Author) and Amazon’s extension to MOBI (Kindle Format 8) — and who’s to say B&N won’t jump into the game with their own incompatible extensions for Nook Color?

In short, it’s the browser wars all over again. The only winner of that war will be traditional publishers.

People writing technical documents, comics, and other works that require more formatting options than current eReaders offer are the ones in a bind here. They’ll have to live with the possibility that what works now might not work next year. They'll have to determine whether it’s worth the effort to work with features that are coded differently in different tablet eReaders, or if they should just work with one eReader and not the other.

I’d like to see a few zillion pixels dedicated to this instead of a misread licensing clause.

Monday, July 18, 2011 11 comments

The "Disposable" Price Point

J.A. Konrath is back from vacation, and brought home an interesting insight. He shares it in One More Nail in the Coffin. The heart of it is:

Kindles have dropped in price to the point where they've become disposable, like cell phones and laptops and digital cameras. Ever notice that you buy a new cell (or computer, or camera) every few years, even if your old one still works?

"Disposable" as a price point seems to have a pretty wide window. To me, it’s a lot closer to $20 than $114 (for the ad-bearing Kindle). Of course, I’m not the people he’s talking about: I’ll use a cellphone or computer until it wears out, or just won’t do what I need it to do. For me, MacBooks have a five-year use life (if they endure the life of hard knocks that laptops are heir to). Since I live in a rural area, and am often doing outdoor kind of things, my cellphones get banged around even more than laptops — if they last three years, they’re limping across the finish line with multiple injuries.

Yes, I’m a cheap so-and-so, and eBook readers are (IMO) nowhere near the “disposable” price point. But fear not, they’re following the same curve as calculators. When I was gifted a Kindle a couple years ago, it was 1974 for eBook readers: $250+, limited functionality. It's now 1976, maybe 1977: prices approaching $99 for basic models, features considered “premium” last year (touch, color) are rapidly becoming standard in the mid-range.

Come “1980” (3–4 years from now), the price wars and standardization shakeout will come. Most of us will have to replace our eBook readers, but that won't matter because they’ll be $49–$79 and will have tablet-like functionality yet with amazing battery life. If what I’ve been hearing about solar panel developments is true, we could see the high-end ($119) sporting a solar panel on the back (again, like calculators except for placement). Lay your reader face-down near a sunny window to recharge it while you’re off doing something else. If you read outside a lot, you could have potentially infinite battery life.

The next step is “1984.” That’s when I had a calculator built into my watch. I don’t know how the equivalent would work for an eBook reader — maybe a goggle display with controls based on eye motion? The end-point is around 1990, where calculators (with solar cells and lots of features) ended up in supermarket checkout racks at $19. The thing is, I don’t think it will take 16 years to get to that point for eBook readers… it might happen by 2020 instead of 2025. Either way, that’s when paper books will finish dying out — when eBook readers are truly disposable.

Thursday, April 21, 2011 2 comments

Transferring eBooks to your Kindle

While Amazon is the primary source of eBooks for most Kindle owners, there are other sources out there: Smashwords and Project Gutenberg, just to name two; and even eBooks you or your friends create. If you’ve never done it, the process can be mysterious… but TFM is here to solve the mystery. I bring you instructions for both MacOSX and that Microsoft operating system. (If you use Linux, you know what you’re doing and you don’t need me to help you!)

If you’re using that Microsoft operating system, make sure you’re connected to the Internet because it may want to download a driver.

Plug It In, Plug It In

The first step is to connect your Kindle to your computer. In case you didn’t know, the Kindle’s charger cord detaches from the charger itself, giving you a convenient USB cable:


Plug the small connector into your Kindle, like you would to charge it, and the large connector into your computer:


USB connectors are where you usually plug in a keyboard, mouse, or “jump drive.” On laptops, they are usually on the left or right sides; some older laptops put everything around the back. On desktops, there are always USB connectors in back, but some have one or two up front — maybe behind a little panel. If you have a USB hub, you can use it, but plugging directly into your computer also lets you charge your Kindle.

The computer treats your Kindle as a detachable drive. On Macs, you’ll see Kindle in a Finder window below the primary hard drive. On that Microsoft OS, it makes a bunch of weird noises, maybe downloads a driver if this is the first time you plug it in, then displays it in the “removable storage” area. I’ve circled what to look for below.

Note: I used Windows 7 for the Microsoft side of things. XP is going to look a little different, but functionally it’s all the same. If your CD/DVD drive is D: the Kindle will likely be at E:.


Electric Slide

Now that you have your Kindle connected, and know where to find it, it’s just a matter of copying your eBooks into the right place. The “right place” is the documents folder inside the Kindle. To see it, click the Kindle in the Finder window (MacOS) or double-click the Kindle in the Computer window (Microsoft thing).


Now that you have the destination in mind, let’s start with the source. When you download an eBook on a Mac, it usually ends up in either the Desktop folder (OSX 10.4 and earlier) or the Downloads folder (10.5 and newer). On Windows, it goes to the Downloads folder. The Kindle can handle eBooks with either a .mobi (MOBIpocket) or .azw (Amazon) extension — so when you download an eBook from a non-Amazon source, make sure you get one of those two types! (Another very popular eBook type is .epub but Kindles don’t recognize them right now.)

So let’s use WhitePickups.mobi as an example file name. Go to the Downloads (or Desktop) folder as appropriate, find the file WhitePickups.mobi, then Ctrl-click (Mac) or right-click (Windows) and select Copy. Go back to the Kindle’s documents directory, Ctrl-click (or right-click), and select Paste. Repeat as necessary to copy more than one eBook.

Almost done!

Eject-o-Mundo

Before you disconnect your Kindle from your computer, you need to eject it. This tidies everything up so you know your eBook is completely copied. To eject on OSX, click the little eject icon next to the Kindle in your Finder window. On Windows, go to the Computer (or My Computer) window, right-click on the Kindle, and select Eject.

Now you can enjoy your new eBook, knowing you’re not forced to use the Kindle Store if you don’t want to.

Other Ways

A program called Calibre is available to manage your eBook collection and simplify transferring eBooks from — and to — your computer. It runs on OSX, Linux… oh yeah, and on Windows too. It has several advantages: for one, it’s a lot easier than going through the steps I outlined above; it also works with multiple eBook readers and (if your eBooks aren’t copy-protected) converts between different formats. If I get a chance, I’ll run that by everyone next week. Until then… happy reading!

P.S. This post isn’t cast in stone, or even ink on paper. If I didn’t cover something throughly enough, leave me a comment. I can fix it.

Sunday, March 13, 2011 4 comments

Twitter Twaddle

It appears that Twitter may want to curtail third-party Twitter clients. Now I think Mashable might be overstating the case a little, and their failure to link to the forum post doesn’t bolster their case, but Twitter does want clients to act the same way.

Too bad they don’t practice what they preach.

I’ve used the official Twitter clients for web, MacOS X, and iPad. They all kind of look similar, perhaps as much as possible given the natures of the underlying platforms. But all three of them do things a little differently:

  • Hover over a shortened link in the web client, and it displays a tooltip showing the expanded URL. Neither iPad nor OSX versions do that.
  • Tap a tweet with no links or hashtags on the iPad, and you get the tweeter’s profile. Click the same tweet in the OSX client, and you get… nothing. On the web client, you get other recent tweets from that account.
  • The OSX client has a pretty slick way of handling multiple accounts — avatars for each account appear in the sidebar and you can click on them to switch. I don’t see that on either the web or iPad clients.
  • In the OSX and iPad clients, retweeting gives you a “quote tweet” option that the web client doesn’t.
Even if Twitter’s own clients worked the same across all platforms, I’d say they’re jumping the gun by trying to limit third-party development. In addition to the Twitter clients, TweetDeck (my primary client until recently), and a FireFox plugin called EchoFon on occasion. TweetDeck is an elaborate client, offering simultaneous views of user-defined lists. For example, I have my main tweetstream, mentions, several searches, direct messages, and new followers in separate panels. It’s a very nice way to keep up with a lot of info at once… too bad it uses Adobe AIR, which makes it screw up under heavy load. EchoFon is very simple, and lives in the bottom right corner of the browser until you pop it up to see what’s going on. Both of them offer different ways to interact with Twitter from the “official” clients, and depending on what you need they can be better ways.

In short, the Twitter ecosystem is far from being complete. Even if it was, it needs to be able to evolve to meet the needs of the people using it. The Twitter developers themselves know a lot about the system internals, but they’re somewhat removed from the people actually using the system day-in day-out. The users know what they want to do and how they want to do it — let the creativity of third-party app developers fill the needs, and leverage the knowledge gained. In other words, adapt the most popular new features to your own apps.

But first, get your own apps working the same way before you demand that third-party developers do likewise.

Thursday, August 26, 2010 2 comments

Head in the Cloud(s)

I haven’t lost my mind, it’s backed up on tape somewhere. — Unix fortune cookie

Tech-utopians believe that we’re approaching the point where the human mind could actually be uploaded into — and run on — computer hardware. I’m firmly in the skeptic camp on this one: perhaps some memories and sensory impressions could eventually be copied; after all, it’s already possible to stimulate certain memories or impressions by probing certain parts of the brain. If quantum computing offers insights into how our minds work, those copies could happen. BUT, can personality be both captured and then run on some kind of hardware? I doubt it.

On the other hand, some of my memory — and most likely some of yours as well — is already stored outside our heads. From the paper address book/calendar, to the lowliest PDA, to our calendar programs, to the fanciest cloud-based PIMs, we’ve offloaded a lot of the basic information we need to do our work (or not get whined at by a friend or family member whose birthday just went by), replacing it with a habit to “check the calendar” on occasion. A lot of this information is useful and even crucial — your mom’s birthday, your anniversary, that scheduled meeting with a potential customer. Some of it, like Amazon’s wish list, can be hazardous to your budget… instead of forgetting about that gadget you saw and thought was cool, add it to your wish list and come back for it later.

The tricks are, of course, to:

1) Make it so easy to add that information to your repository, wherever you are, whenever you need to, that you just do it without thinking much about it.

2) Extract that information — or better yet, have it automatically presented to you — at the right time.

As much as I like to slag on cellphones, they really do help with part 1 — even if you don’t have a signal at the crucial moment, you can often configure the phone to bring up an audio recorder without too much effort. I set up my old Samsung Sync to bring up the recorder by pressing one of the arrow keys, if I remember right. Of course, the smarter the phone, the easier it can be to find useful information entry apps. On the other hand, if you want to pay for Jott, you can use any phone capable of dialing a number (Jott converts a brief voice message to text and can return it to you in a large number of ways).

But the other side of the coin is getting that information back at the right time. Again, there are plenty of ways to make that happen. While Remember the Milk is popular, I kind of like Chandler for its open-source, cross-platform goodness. Unfortunately, the client is currently broke for Leopard and Snow Leopard; there’s supposed to be a workaround, but it didn’t work for me. Once they get the client working again, I’d love to see a full-function iPad client; right now, there’s a write-only “Chandler QE” (Quick Entry) iPhone app that’s okay for brief notes and events. Directly accessing notes at the Chandler Hub is a workaround on the laptop for now… I can’t enter text from the iPad for whatever reason though (grumble mumble) except by using the iPhone app (snarl hiss).

One thing I’ve started using Chandler for is to capture whatever random thoughts about White Pickups wander through my mind at any given moment. I thought I was going to start working on the last part of Book I today at lunch, and realized I needed to give the plot a little more thought… into the iPhone I went and added the information, now it’s on the hub whenever I’m ready for it.

So as always, you get your choice between free (or Free) and community-supported, or paid for and (maybe) reliability. The big problem I see with the latter is that going with a commercial cloud-based service is like giving your data to some corporation and then renting it back. Everything’s fine until you can’t make the next payment.

LinkWithin

Related Posts Plugin for WordPress, Blogger...